The quality of car headlights runs a pretty wide gamut. They’re so variable, even on new cars, that the Insurance Institute for Highway Safety (IIHS) had to add a headlight category to its testing and make a good score a requirement for its Top Safety Pick Plus award. On older cars, things get way worse.
For example, your old car could have shitty sealed beam headlights that are a decade old and put out about as much light as a mouse holding a (mouse-size) candle. Or, like me, your car could have had awesome bi-xenon projectors when it was new 20 years ago, and the ravages of time and use have made them decidedly craptacular.
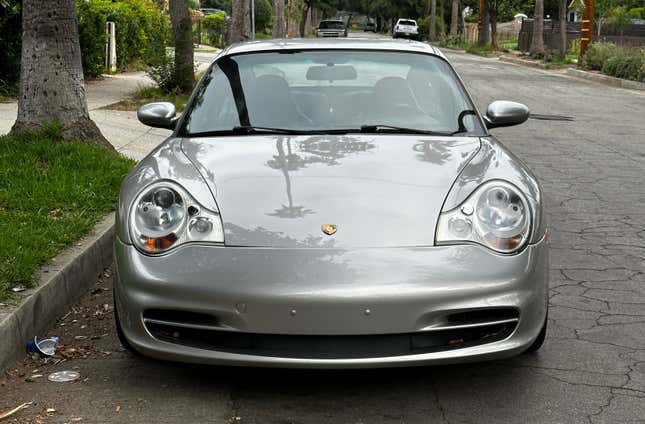
Part of the degradation of my headlights stemmed from the UV damage they had experienced over two decades in the California sun, which, if you’re a fan of Project 996, you’ll know I remedied with a lot of sanding and a little 2K clearcoat. While getting the lenses clear again definitely helped my light output, it still wasn’t what I felt it should be, and driving at night still sucked.
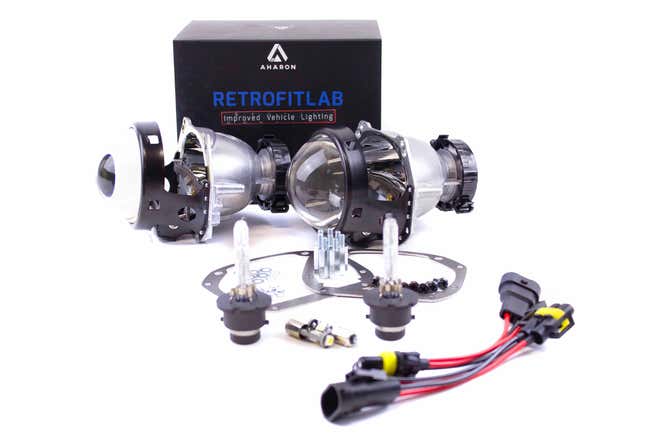
This meant it was time for something a little more drastic, and by that, I mean new projectors. Technically, this is kind of taking the nuclear option since I had no idea how old the headlight bulbs were (probably original) or how good the ballasts were (also original). Still, after doing some research, I decided that this was the way I should go, and conveniently, a Dutch company called The Retrofit Lab makes a projector upgrade kit for my second-generation 911 headlights, and it was only $169 for the kit and another $148 for new Phillips bulbs, so I ordered it.
Buy headlight restoration kits: Amazon
(Full Disclosure: When The Retrofit Lab found out I was doing a story on my headlight upgrade, the folks there extended me a small discount on the parts that are made in-house. It was really nice of them, but I was going to buy it anyway.)
The Retrofit Lab kit is pretty rad. With a lot of headlight upgrades, you end up having to remove the lenses or cut into the housings, etc. In my case, I didn’t have to do any of that. After watching TRL’s how-to video, it seemed like I’d just have to remove the old projectors, save their mounting frame, and bolt some laser-cut brackets on the new Optimus projectors to set the right depth since they’re much more compact than the original Hellas. In practice, it was a little more involved than that.
First, I want to preface by saying that this is actually a relatively easy upgrade to do, even if you’ve never done a headlight upgrade before. The problem is that The Retrofit Lab’s how-to video (which is the only form of instructions included with the kit) shows the installation on a set of halogen lights, which are similar but not the same as the Litronic bi-xenon lights, and it starts mid-process with the rear cover taken off of the lights already. Not ideal.
Luckily, I found a video of a guy doing the install on his Litronic bi-xenon lights that shows the differences and parts of the process that are missed by the original video. Following this video, I was able to do the upgrade on my first headlight in around an hour and a half, which included lots of cleaning and replacing other bulbs. I did the upgrade inside my office in a clean space with good lighting, which definitely helped, as did having the right tools.
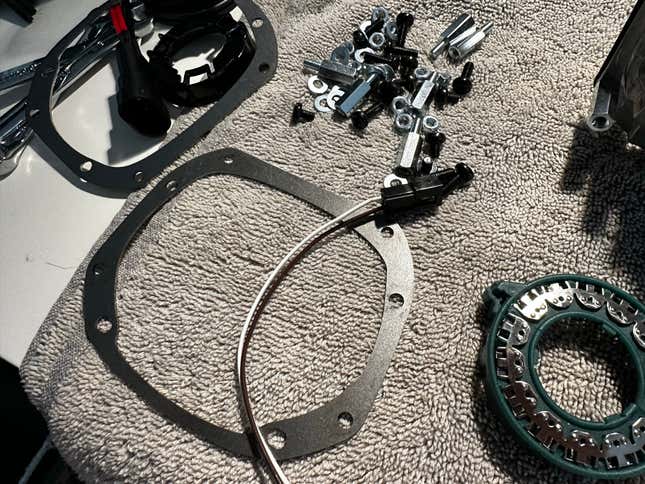
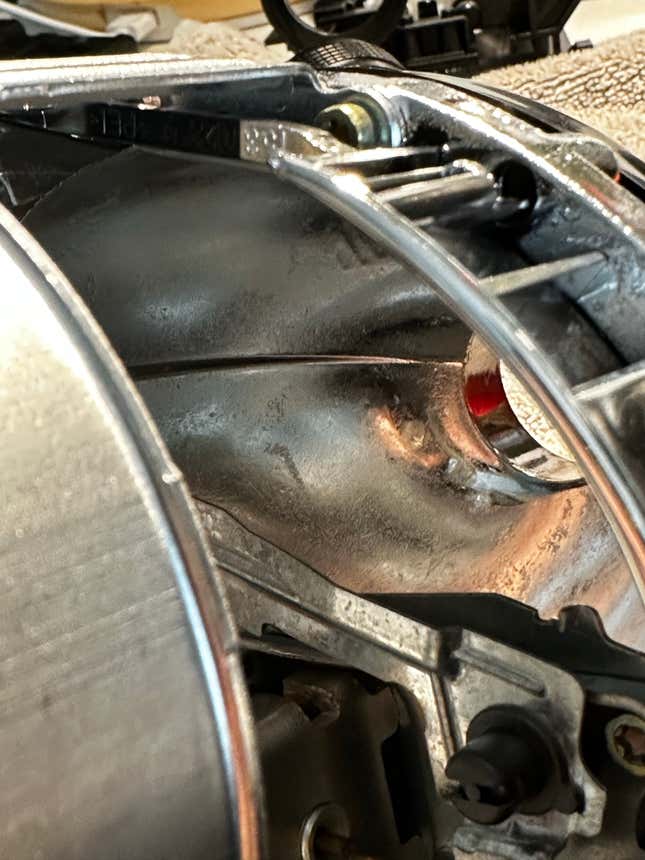
To get things disassembled, there are mostly Phillips and Torx screws to remove, as well as a couple of electrical connectors and some plastic ball-and-socket joints. One of the big areas that the factory xenon lights differ from the halogen projectors is that where the halogens have three screws holding the frame to the headlight housing, the xenons have four, and the fourth one is almost totally inaccessible. I’d never have known this without the other video and would have been super frustrated. I was able to get the last screw out because I was using the iFixit Mako precision driver kit that I normally use to work on PCs, and it has a flexible shaft extension; I’d consider something like this mandatory for doing this upgrade.
Putting stuff back together is pretty simple, with only a couple tough or tricky parts, and these are documented well between the two install videos. In addition to your screwdriver, you’ll also need a 7mm wrench, a ¼-inch ratchet and a 7mm deep socket for attaching the laser cut bracket and standoffs to the new projectors.
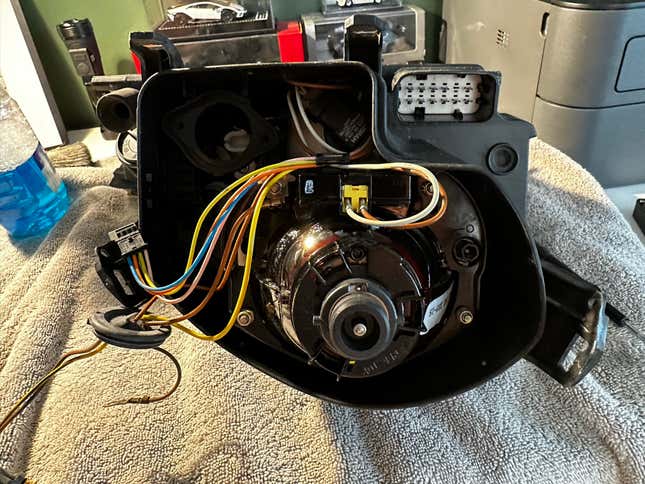
One of the other big potential stumbling blocks with this process is the wiring. The adaptor harnesses that The Retrofit Lab gives you are awesome and work well, though a couple of them are not super clear as to polarity, so you’ll need to look at a wiring diagram. The real issue is the age of the stock wiring. After 20 years inside a hot headlight, the insulation is fairly brittle and prone to cracking and flaking off. Mine was mostly okay, but if I get back in there again, I suspect I will have to either replace wires or heat shrink a bunch of them to prevent issues.
My second headlight took around half the time of the first, which, as we all know, is usually the case with these kinds of projects. While I was in there upgrading the projectors, I also replaced the D2S bulbs with new Phillips X TremeVision Ver. 2 bulbs, which weren’t cheap at around $165 for the pair, but they’re the highest rated xenon bulbs you can get, and I figured it was a dumb place to cheap out. I also replaced the halogen high-beam bulbs, though they don’t do much with the bi-xenon system working properly. Lastly, I left my stock Hella ballasts in place because these are extremely well-regarded and not prone to failure. Also, if they did fail, they’re easy to replace.
A bunch of you are likely already shouting at your screen, wondering why, if I was going to all this trouble, I would not just upgrade to LED. The answer to that is kind of complicated. First, My headlight and projectors were designed for use with bi-xenon bulbs, so the pattern will be best suited for that kind of bulb. LEDs are very different and could cause glare for oncoming traffic. I don’t want to be that guy.
Next, LED light doesn’t seem to throw as far down the road. I watched a few videos from a couple sources, and the consensus is that bi-xenon works better despite the system’s complexity. Lastly, I’m a real stickler for light temperatures. This is partly because of the look (I like the OEM look, as a rule) and also because my eyes get fatigued pretty easily while driving at night anyway. The Phillips bulbs I got are around 4300-5000k, which are close to OEM and fairly close to daylight. As far as I’m aware, LEDs aren’t as good at the daylight thing.
Oh, and the LED upgrade kit – which is an option from the Retrofit Lab – was like twice as much money.
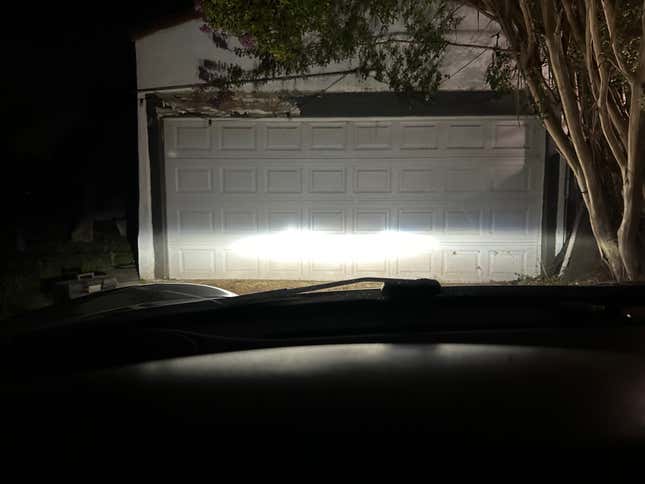
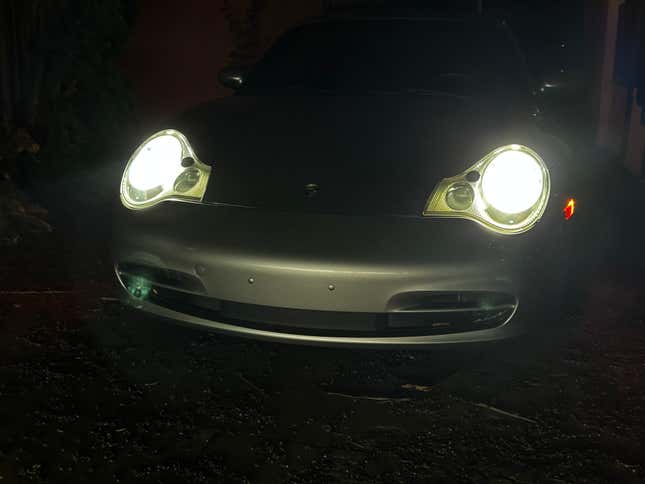
So, after all that, how does it look, and was it worth doing? Yes. Absolutely. Unequivocally. This mod made such a huge change in how the car drives at night. Where before I’d struggle to see things 50 or 60 feet down the road at like 20 mph, now the road is lit up for hundreds of feet on the low beam, and it’s unbelievably bright on high beams. I no longer feel like I have to drive with my fog lights on all the time because my headlights need the help. It’s also just a very satisfying modification to do.
Overall, the beam pattern is excellent, and the cutoff is nice and sharp. The Retrofit Lab nailed the kit because the car looks stock from the outside, which was important to me, and the headlights function exactly like OEM, just better. Aside from the iffy instruction video situation, I’d highly recommend this kit to other 996 owners, and of course, TRL offers kits for other makes and models, too.
My car now feels extremely modern thanks to the upgraded PCCM Plus infotainment system, the new headlights and the refreshed suspension. It also feels ready to terrorize the canyons for another 20 years, which is amazing for something with over 140,000 miles on it.